Categories Home Inspection, Home safety

Watch Out for These Spring Plumbing Problems

Winter can take a real toll on your home’s plumbing. As the temperatures are rising in spring, many homeowners find they are dealing with a few smaller problems popping up.

If you experienced frozen pipes during the winter, you’ll want to pay special attention to your plumbing, as the expansion of ice within the pipes can lead to cracks or even a full burst.

Below we’ll go through some of the common spring plumbing problems to keep an eye out for.


Typical Spring Plumbing Issues

1. Foundation shift

Extreme weather, like heavy rains, can cause movement beneath your home.

When the ground below becomes too saturated to absorb more water, a shift will occur and your home could suffer various leaks.

If left unnoticed for too long, your water bill will see a spike, since pipes could be damaged. You’ll want to call a professional to check it out.


  • Avoid this by keeping an eye on your plumbing and immediately turn off the water if you notice any major changes.


2. Cracked Water Pipes

Frozen pipes can lead to serious issues in warmer weather. And while the consequences have the potential to be detrimental to your home, there are some easy steps you can take to prevent damage.


  • Avoid this by insulating your pipes or turning off your water altogether when temperatures are very low.


3. Sink or Tub Not Draining

Maybe you enjoyed a few bath bombs to get yourself through the long winter or you had to give the family pet a bath — you can’t exactly hose them off outside when the temperature is cold!

Either way it’s normal to see your bath or sink accumulate different things over the seasons. Clogged drains aren’t the worst problem to run into and you have many options when it comes to this issue.

  • Avoid this by cleaning the drain stopper frequently; make it easy on yourself by cleaning it weekly and it won’t have a chance to get so gross.


Are you one of the lucky few that haven’t come across one of these typical spring plumbing problems?

There are still a few things you can do to make sure your plumbing is in line, so you can spend more time outside enjoying the warm weather!

  • Clean and inspect your roof gutters. Remove debris and make any repairs now to save yourself from bigger problems down the line.
  • Test the sump pump which may have frozen in winter and won’t be able to properly do its job now. If broken or working erratically, you may consider a professional maintenance.
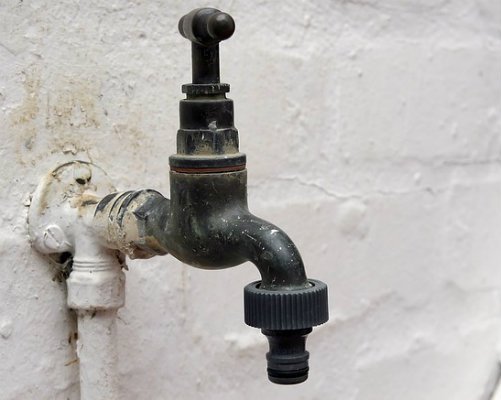
  • Check for leaks around different parts of your home, especially around the hose bibs (the low, outdoor faucet).

We hope that you find these tips useful and can avoid any major issues so that you can get straight into enjoying the spring season! If you want to save yourself time and trouble go ahead and schedule a full inspection with us!

EIG guarantees an inspection within 48 hours of scheduling.

We’re Here to Help


Image attribution

Categories Home safety

Three Pesky Stair Problems and How to Fix Them

Stairs, especially in older homes, can be a beautiful focal point.

But over the years, continuous foot traffic can lead to sloping, loose boards, faulty handrails, etc.

All of these pose serious risks to you, your loved ones, and even family pets.

While some of the common issues with stairs may not be dangerous, they can be annoying. Read on to find out some quick and simple DIY fixes for common stair troubles.


How to Fix Common Problems With Stairs

1. Wobbly Handrails

Loose or jiggly handrails should be addressed immediately, since the longer you put it off, the more risk you face.

When it comes to handrails, there are many ways they can be configured: fixed to the wall with brackets, secured with a newel post, screwed into a wall plate, or even a combo of each of these.


What to do if the handrails have brackets:

This is an easy fix, just change out the screws. It doesn’t matter if they are installed into the wall or directly to the handrail.

What to do for handrails on newel posts:

There are a few options here. But if the problem is with the post, you just need to install larger and longer lag screws into the base of the newel post.

If the problem isn’t the actual post, check the handrail fasteners and tighten with a wrench.


2. Noisy Stairs

This is usually the most persistent and pestering issue with stairs. The creaking noise we all try to tiptoe around and hold our breath when making late night trips to the kitchen. Luckily, this is an easy fix!


What to do for creaking stairs:

Identify the source of the sound and determine if it’s louder on one side than the other. Then, hammer in a thin nail or screw to the support board and make sure your fastener is aligned with the others.


3. Broken Treads

Not all of the dangers are inside the home. If you have a small staircase or patio stairs outside of your home, you must be mindful of their condition as well.

Mainly because they are more exposed to the elements, they require much more upkeep.


What to do if the tread of your stairs is damaged:

You should replace them immediately. You have a few options here: aluminum, vinyl rubber, or carpet.

Bonus! Stair tread can extend the life of your stairs by protecting them from the wear and tear of continuous foot traffic. For extra safety consider adding tread to stairs in areas around decks or pools.


As you can see many of the common problems have a simple (and cheap) solution that won’t even take up your entire weekend. Addressing these issues right away can prevent serious accidents.


Extra Safety Tips

  1. Keep stairs well-lit by installing light switches at the top and bottom of staircases.
  2. Remove loose carpet or throw rugs from the landings.
  3. Be diligent about removing clutter.
  4. Consider painting the edge of each step a contrasting color so that it is easily visible.
  5. Keep an eye on the conditions and maintain upkeep accordingly.

As always we hope these tips will help keep you and your home safe! If you have some concerns about other areas of your home, don’t hesitate to reach out.


Schedule an inspection here!

Image Attribution

Categories Home safety

Keep These Trees Away From Your Home

For many of us our home is our sanctuary, and we put a lot of time and money into making it comfortable and appealing — inside and out.

When it comes to the outside, you may think you have free reign and can get away with most landscaping choices.

However, there are actually quite a few landscaping decisions you should avoid, especially when it comes to trees.

If you’ve been toying with the idea of sprucing up the outside of your home by planting a tree or two, be sure you avoid these specific types.

Before you head to a nursery double check this list so you don’t find yourself in a situation more trouble than it’s worth.

Trees to Avoid Planting Near Your Home

 1. Silver Maple

These trees are big and grow fast, and they give off great shade.

But because of their rapid growth, they are more susceptible to brittle, weak wood that can easily break off during storms.

They also have shallow roots that can invade plumbing systems and even destroy your walkway or driveway.


2. Cottonwood

This is a favorite…for those in the tree removal business!

Although beautiful, these trees come with a running list of headache-inducing issues you’ll be dealing with way down the road.

Because they are wet trees, they are more likely to rot easily and quickly, so they attract insects which will lead to quick decay.

And finally they have a short lifespan of only 25-35 years, meaning you’ll be calling in the removal services.


3. Mimosas

There’s not much to say here except your neighbors probably won’t appreciate you much: this disease-prone species will spread their seeds and sprout in yards within a quarter-mile of your own.

Additionally, they’re typically only beautiful two weeks out of the year and sport unattractive brown seed pods the rest of the year.


4. White Mulberry

Yes, we can hear the sound of your hearts breaking, but stick with us and you’ll never want to see another Mulberry in your life.

Not only are these extremely messy, but they have extremely aggressive roots that will crack your pavement.

If that’s not enough to deter you, maybe this will do the trick: these allergy-inducing trees produce berries that birds love, but unfortunately it’s a laxative for them.

Just imagine what fun that will be for you, your car, the side of your house, etc.


5. Willow

Thanks to their low hanging and slender branches, Willows are one of the most easily recognized trees out there.

However, they’ve got some seriously thirsty roots that will attack your sewer lines, irrigation pipes, and drain fields. Also, they have a very short life span of about 30 years.


We hope we didn’t make you too sad with this list of trees you never want to plant near your home. But ultimately we’re here to give you great professional advice to keep your beloved home in tip-top shape.

If this list has you thinking about other precautions you should take for the home, give us a call! We can help reassure you that your home is in good condition.

Schedule an inspection here!

We Can Help

Image attribution

Categories Home safety

Surefire Ways to Tackle Spring Cleaning

Spring Cleaning

The official start to spring just around the corner!

You are probably making up a quick to-do list in your head of all the spring cleaning items you’ll soon be tackling.

If you are avoiding it, it might be because you don’t like getting rid of stuff or you feel it’s too big of a task.

While many families dread spring cleaning, it doesn’t actually have to be so terrible.

So if you’ve never done a proper spring cleaning or you seem to lose your steam halfway through, follow our tips to stay on top of it:


Strategies are Essential for Success

Taking on a deep clean of the entire home is a big task, so you will need a plan.

Start by organizing tasks by each room and focus on the areas that have been neglected rather than re-cleaning something that has recently received attention.

A plan will not only keep you sane, but it will make the whole process more efficient and less stressful.


Free Yourself from Clutter First

Before you do anything, you’re going to have to roll up your sleeves and get into the clutter.

Assign each family member a room or even make them responsible for their own things.

Separate items into donate, sell, and trash piles. Clearing out the unnecessary mess will make the entire cleaning process that much easier.


Assemble a First Aid Kit

We’re not talking about a real first aid kit with bandages and ointments.

This is more of a home first aid kit, with all the essentials you’ll need to perform a proper clean.

You’re going to need things like: an all-purpose cleaner, disinfecting wipes, rubber gloves, glass cleaner, duster, microfiber cloths, etc.

Pro-tip: Investing in a suitable vacuum will definitely payoff.


Take Everything Apart

It’s important, especially when dusting or vacuuming, that you get every nook and cranny.

Take everything off of the shelf, bookcase, move the furniture, etc. rather than just dusting around it. A little extra effort now will do your home, and your possessions, some good in the long run.


Don’t Forget the Fridge

Even if you fancy yourself diligent in throwing out expired foods, you should take an hour or two to really focus on your fridge.

Remove everything and check it all. Wipe down containers with leftovers and then spray down the inside of the refrigerator with water and vinegar before putting everything back.

Pro-tip: Clean your fridge’s condenser coil to prolong the life of your appliance.


Spring cleaning is not so daunting if you take the time to make a game plan… and then stick to it!


Are You Ready?

Is this your first spring cleaning rodeo?

If not, would you add anything to the list? Let us know in the comments below. We love to hear from you!

We hope these tips will serve you well and help you prepare your home for the warmer months.

If you haven’t had your annual home inspection do it now! This is an easy thing to tick off your to-do list.


Image attribution

Categories Home safety

Seven Things to Know Before Starting Home Improvement Projects

Home Improvement Projects

Construction can be messy.

We know because we’ve seen plenty of mishaps over the years. One thing we’ve come across in our inspections are complications caused by DIY home improvement projects.

If you’re considering tackling a home improvement project in the near future, keep these tips in mind to ensure you’re on the right track.


Things to Keep in Mind

1. There will be problems.

Sometimes there’s no planning for the unexpected.

Considering how messy construction projects can get, you will likely face a few roadblocks.

Staying calm and embracing each situation is essential for not getting burnt out mid-way through a construction project. Stay cool and you’ll come up with a solution to get through any issue.


2. Set a clear budget.

Think about how much money you really have and are comfortable spending long before embarking on any home improvement venture.

The last thing you want is to run into financial troubles while you’re in the middle of remodeling your kitchen.


3. Invest in a contractor.

Hiring a contractor is not an area where you want to try to save money.

Finding one that you really trust is key to a successful project and will be well worth the payment.

Use referrals, read reviews and inquire about their experience to determine if a contractor is right for you. And don’t underestimate the power of intuition: You’ll be spending a lot of time together so go with your gut!


4. Organize your resources.

Know what you have readily available and what you’ll need to purchase or rent — this will also play a helping hand in your budget. Go through and make a list of what you have and you’ll save yourself time and money!


5. Pull out the original blueprints.

Having your original blue prints or any house plans from other home improvements over the years will be very helpful.

Offer these to your contractor and you’ll likely save everyone time, yourself money, and you’ll get the process moving along much faster.


6. Have a contract.

Before embarking on any journey that will impact your finances, you’ll want to have a contract in place.

If a contractor acts shady or refuses when you mention a contract, ditch them! The contract should include the company’s name, address, and phone number, and have start and completion dates, plus estimated cost written into it.


7. Lock down necessary permits.

If you’re taking on a big project, it’s likely that you will need a permit.

The contractor should provide the costs for all permits in your estimate; and usually the contractor is responsible for pulling the permits from local offices unless you agree otherwise.

Home improvements that may require permits include new windows, fences; structural changes, like building a deck; and plumbing and electrical work.

Ask your city council office for information on improvements and projects that require permits.


A clear idea and a little planning will go a long way in ensuring a successful home improvement project.

If you have any concerns or doubts about how a new project will affect your home, get in touch with us here or schedule a home inspection today!


Image attribution