Categories Home Inspection

Is Your Garage a Fire Hazard?

garage hazard

Garage fires can happen. We’d like to give you the tools to make your garage as safe as possible from fires, as well as how to protect your home in the event of a garage fire.

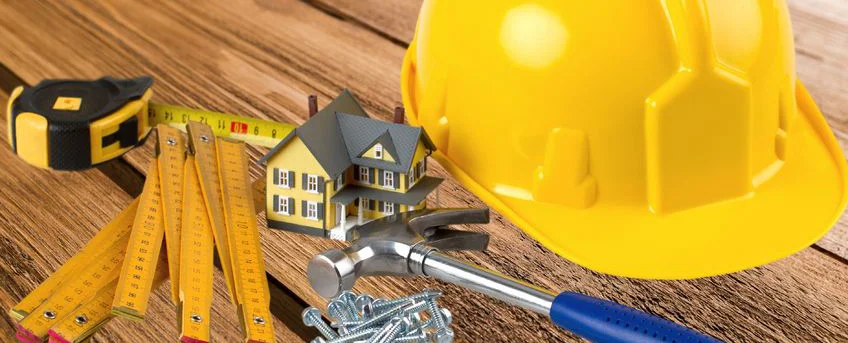
Regardless of preparedness, your best bet is to hire a professional inspector to assess the safety of your garage.

We should mention this article pertains to attached garages only.

Why Are Garages Prone to Fires?

  • Garages are typically the storage centers for flammable materials such as gasoline, paint, motor oil or other flammable liquids, including paint thinner or brake oil.
  • You park your cars in the garage. Oil and gas can leak, sometimes unnoticeably from your vehicles, eventually leading to igniting a fire, if given a chance.
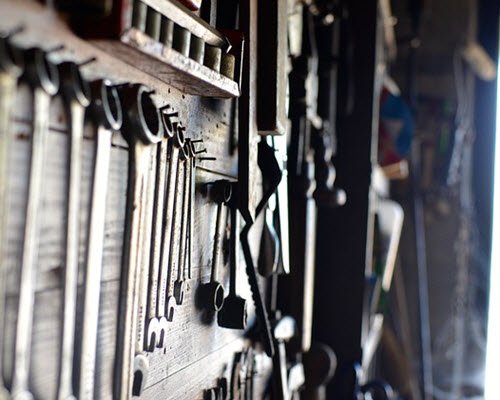
  • The garage is a handyman’s workspace, where accidents involving welding, cars or flammable liquids pose a fire hazard.
  • Water boilers and heaters are typically located in the garage and can cause sparks, igniting fumes or fluids.

Preventing the Spread of Garage Fires

  • Install a hatch or barrier to access to your attic, if there is an entrance leading to your garage.
  • Hire a professional inspector to assess if your walls are fire-rated. And unless you are trained, it can be difficult for the average homeowner to make this assessment alone. So, it’s better safe than sorry!
  • Keep the floors clean and devoid of clutter, including bits of paper, rags, oil-stained materials or other flammable materials. Eliminate the opportunity for fire to spread by keeping your garage floor tidy.
  • Tape down and organize cords and wires, so they are not twisted or tangled.
  • Avoid overloading electrical outlets, which can cause sparks or smoke.

Things to Consider, If You Have a Garage Door Leading into Your Home

  • Pet doors, especially those made of plastic are highly flammable and can facilitate an easy spread of fire to your home.
  • A self-closing door may sound like a pain when you’re hauling things in and out of the garage, but it’s an easily-added safety feature to protect your home.
  • Make sure your doors are properly and strongly sealed. A professional inspector can assess the safety of your door’s seal and recommend adjustments, as necessary.

Final Tips

  • Avoid using any burners or open flames in your garage. This includes propane deep fryers or grills. Thanksgiving has seen countless deep-fried turkey disasters, all due to propane accidents!
  • Clearly, label and store flammable liquids above ground. Only store liquids in small amounts and replace, as necessary.
  • Store propane tanks outdoors. They are sturdy enough to withstand the elements and pose the threat of exploding in your garage if triggered.
  • Keep a fire extinguisher handy and safely stored above ground.

Fire safety is all about prevention. Ensure you are taking the proper precautions to protect your home and garage from the threat of fire with our simple tips.

So, remember, a skilled, professional inspector is always the best way to go, to ensure the safety of your home.

Most of all, remember, we’re here for you! Schedule your inspection today, and we’ll see you in 48 hours or less!

Image attribution.

Categories Home Inspection

7 Must-Have Tools For Homeowners

homeowner tools

Whether you’re an avid handyman or aspiring DIY-er, having a cohesive set of tools at home will prepare you for pesky repairs or when inspiration strikes.

1. Duct Tape

Duct tape is one of the most versatile and resilient resources. Add it to your go-to emergency repair toolkit, as it is extremely strong, adaptable and waterproof.

Pro Tip: You can use duct tape for temporarily sealing water leakage, patching vinyl siding, taping a broken window or screen, protecting grill gas hose from pesky critters and more.

2. Wire Cutters

Great for snipping wires or small nails. There are three main types:

  • Beveled edge: Cuts wires to a pointed tip.
  • Semi-flush: Used for fine wires and cuts to a flat tip.
  • Flush cutters: Offers a sheer face cut; usually expensive with a high level of precision.

Pro Tip: Most wire cutters are not intended for hard metals, such as iron or steel unless specifically specified. Never hammer or bang on wire cutters to make a cut, as flying debris can be harmful.

3. Respiratory Mask

You should wear a mask when painting or in a dusty/dirty environment. Although paints and coatings have been improved and contain less toxic chemicals, you should still avoid inhaling directly.

Pro Tip: Disposable masks are inexpensive and usually come in a pack of 10 or more — be sure to throw away after each use.

4. Set of Screwdrivers

While electrical screwdrivers can get the job done faster, manual versions are more portable and convenient for small, hard to get places. What’s more, you don’t have to worry about recharging your tool, when you need it in a pinch.

Pro Tip: We recommend a set of four screwdrivers: a big and small version of a flathead and Phillips-head. Did you know, the Phillips-head was invented in the 1930s as a solution to “over torquing”, where the user of a flathead was exhibiting too much twisting force and thus not making the most efficient use of their strength?

5. Claw Hammer

One of the most important tools for any homeowner. You can use a good hammer for driving and removing nails, and in combination with many other tools.

Pro Tip: We recommend a 16-oz hammer for the most bang for your buck and all-purpose use.

6. Combination Wrench Set

One side is open, and the other is a closed loop, as nuts and bolts come in metric and standard sizes, you’ll need both ends.

Pro Tip: Avoid over-tightening and always pull the wrench toward you.

7. Tape Measure

Much more efficient and compact than a ruler or yardstick. You’ll use a tape measure for a multitude of purposes and will be glad to have it around.

Pro Tip: We recommend a 25-ft tape measure, although longer may be better suited depending on your purposes. Don’t forget always to measure at least twice!

Consider this a starter pack. Once you become a homeowner, you’ll realize your needs increase, and you’ll likely be adding to your toolkit in no time.

Don’t forget, we guarantee your inspection in 48 hours — schedule yours today!

Image attribution.

Categories Home Inspection

7 Misconceptions About Home Improvement

home improvement misconceptions

The verdict is in, and we’ve got the lowdown on the biggest home improvement misconceptions.

The overlying theme? Less is more and simplicity is usually the way to go. Do your homework and make responsible decisions for your home.

1. Costly Contractors Are the ONLY Way to Go

Not necessarily. Do your homework and conduct thorough research before settling on a professional contractor. Check out their site: what are customers saying?

Are there any success stories or photos available? Consult friends and family for potential recommendations. Just because the sticker price is high, doesn’t guarantee top quality or service.

2. Remodeling Always Adds Value

Think again. What is aesthetically pleasing to you, may deter future buyers. Especially if you know you have plans to sell your home down the road, stick to timeless designs and avoid an exaggerated color palette.

You can always spruce up the place with less permanent (and costly) additions, such as artwork, furniture, rugs, etc.

3. DIY Always Saves You Money

Unless you’re a skilled professional or really know what you’re doing, step away from the sledgehammer and reconsider your DIY “demo day.”

You might have a zest for home improvement, but rushing into a project, without proper preparation, planning or skill could cost you more in the long-run. In fact, it usually costs contractors more to fix a problem, than if they’d been hired in the first place.

4. Energy Efficiency Is Expensive and Complicated

Not true! You don’t need to install high-tech solar panels on your roof or start a compost pit in your backyard to be energy efficient. There are super simple solutions to everyday energy efficiency to save you massive dollars in the long run:

  • Limit your showers to 5 minutes
  • Turn off lights and unplug electronics when not in use
  • Opt for LED or CFL lighting, rather than traditional incandescents
  • Utilize natural light during the daytime

5. Pools Increase Home Value

Pools are also a huge liability and require extensive upkeep. Not to mention the cost of building and installation.

For many home buyers, pools are simply “too good to be true” — the extra responsibility and maintenance is simply not worth the minor convenience on a hot summer day.

6. Replace Your HVAC Filter Monthly

In fact, the Department of Energy recommends homeowners check their filters every month with the understanding most people will replace them every 3-4 months.

You could be tossing out perfectly good filters and wasting a whole ton of money — if it looks dirty, replace it. Otherwise, every three months is a good rule of thumb.

7. Lemons Are Good for Your Garbage Disposal

The smell might seem nice, but citric acid can corrode metal blades, and tough peel can damage grinding gears and clog pipes.

Instead, opt for a tray of ice cubes, which helps clean the blades and buildup. Vinegar is an excellent, safe alternative for eliminating unpleasant odors.

Were you fooled by any of these home improvement myths? Are we missing any? Let us know!

Image attribution.

Categories Home Inspection

Yes — Even New Home Construction Needs An Inspection!

new construction inspection

Even brand new homes need inspections.

Homeowners often link problems down the road to faulty construction from the start. In fact, it’s not uncommon for a new home to have 10-30 issues during the final inspection walk-through.

It doesn’t mean the builder is dishonest; it is simply best to have a second set of eyes, to ensure everything is done to your standards so that you can settle into your new home with sound peace of mind.

Three reasons you should have a private inspection on new construction (in addition to the city inspector!):

    • City inspectors are only responsible for enforcing local building code with minimum safety standards. They do not inspect for the quality of construction or adherence to materials manufacturers’ installation instructions. They do not look for cosmetic flaws, including leaky faucets or scratched tiles.
    • City inspectors are highly overworked AND underpaid. A city inspector may be asked to look at upwards of 20 homes at day. At that volume, they make careless mistakes and overlook simple repairs. Elite Inspection Group never schedules more than two inspections per day, per inspector. We value quality over quantity, any day of the week!
    • New construction inspections are especially useful for out-of-state buyers. EIG will be your eyes and ears on the ground, to ensure your new home meets your desires and your will be ready for you.

If you decide to take on the final inspection yourself, here are a few words of advice.

Make a List — in Writing!

During your inspection, make a list of needed repairs or adjustments. Be sure to get it all down in writing and verify your builder receives the list, either via certified mail or in-person.

Don’t Rush

Take your time walking through your new home. You want to be thorough and detailed in your inspection, so nothing is overlooked. Don’t feel pressured by the builder to “get it over with” — this is your home, and it should be perfect.

Plan Ahead of Schedule

Arrange your final inspection about a week before your closing date, that way if the builder needs to make any repairs, they have plenty of time to get it done. Inspecting too close to your set closing date will only push your move-in date back, should there be additional repairs.

If a self-inspection seems a bit daunting, leave it to us! We break down the new construction home inspection into 3 phases:

  1. Pre-Drywall Inspection: following the installation of framing, plumbing and electrical rough-in and just before the placement of insulation and drywall.
  2. Final Inspection: immediately before your final walk-through with your builder.
  3. 11-month Warranty Inspection: one final look at your home before your warranty expires.

A new construction home inspection should be thorough and inclusive of exterior and interior elements. Here are a few examples of what we’ll look for:

Exterior

  • Foundation
  • Roofing
  • Framing
  • Lot Drainage
  • Doors & Windows
  • Porches & Decks
  • Sidewalks & Driveways
  • Sprinkler System
  • Pool/Spa
  • Built-In Outdoor Appliances

Interior

  • Electrical
  • Plumbing
  • Basements
  • Crawl Spaces
  • Ceilings
  • Floors
  • Attics
  • Insulation
  • Fireplaces
  • Appliances

We Can Help!

Schedule your new home inspection with us today! We’re open seven days a week and are always accepting new clients.

Check out our easy scheduling tool!

Or get a quick quote.

Image attribution.

Categories Home Inspection

6 Top Cause of Water Damage REVEALED

gutters

It’s an area, homeowners often overlook or entirely ignore: gutters.

A bit of a funny question, but — when’s the last time you checked out your gutters?

When done correctly, gutter maintenance is one of the simplest and most cost-effective ways of preventing expensive water damage.

Regardless what condition your gutters are in, we’ve got a handy solution for you.

1. Clogged

It’s the most common problem of them all. Twigs, leaves, critters, rain — it all gets stuck, cramped and clogged in your drains. If you leave it unattended, it could lead to sagging gutters or breaking apart entirely.

When leaves and other items clog your gutters, your gutters are rendered entirely useless. 

So, aim to clean them out once or twice a year — perhaps more if your home is in proximity to trees.

Take caution after big storms and check your gutters for fallen or broken off debris. If clogged gutters is a chronic problem, consider getting them fitted for mesh screens, grates or porous foam.

2. Sagging

Whether a result of clogged gutter or the simple passage of time, sagging gutters can be dangerous.

The reason for sagging is typically a deterioration of the fasteners or hangers, or the fasteners are spread too far apart, and thus unable to support the weight of the gutter.

Not sure if your gutters are sagging? They should be completely straight, except for exceptionally long gutters which may have a peak in the middle to encourage water flow.

The solution is simple: new fasteners and hangers are easily accessible at most hardware stores for a few bucks.

3. Leaks and Holes

Even the tiniest of leaks can lead to massive water damage for your home. Try a simple tube of gutter sealant (about $5) for smaller holes and leaks.

Large gaps may require metal patching — luckily most hardware stores offer gutter “patching kits.”

4. Misaligned Pitching

In order for water to flow properly from your gutters, they must be pitched properly. The general rule of thumb is ¼ inch of sloping per every 10 feet.

So if you’re not sure if your gutters are sloped correctly, take a peak after it’s rained — standing water is a telltale sign of misaligned pitching.

Correcting the pitching can be a big project, potentially requiring you to remove and reattach parts of the gutter — it may be best to call in an expert to make sure the job is done to perfection.

5. Downspout Drainage

If your downspout is too close to your home, water will leak straight into your foundation and basement.

Ideally, downspouts should extend 4-5 feet from your home, and you can purchase them for roughly $20 each.

6. No Gutters At All

Think about investing in a gutter system to protect your home and its structure. Systems come in varying prices, depending on size and material.

However, aluminum is the typical go-to for residential properties. With routine maintenance and checkups, your gutters could prevent major repair costs (and headaches!) down the road.

We Can Help!

We cover gutter and drainage inspections for homeowners, buyers AND sellers — schedule an inspection today or get a quick quote.

Image attribution.